There are two methods for defining the HTTPS certificate. Use your own certificate or GARDiS to generate a self-signed certificate. It is also possible to use a .PEM and .Key file for the certificate.
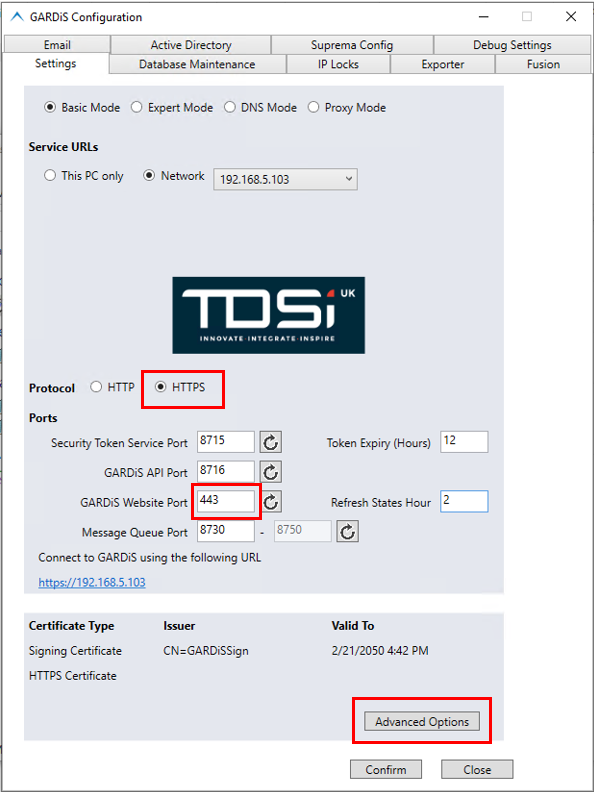
Open the GARDiS Configuration tool as Administrator.
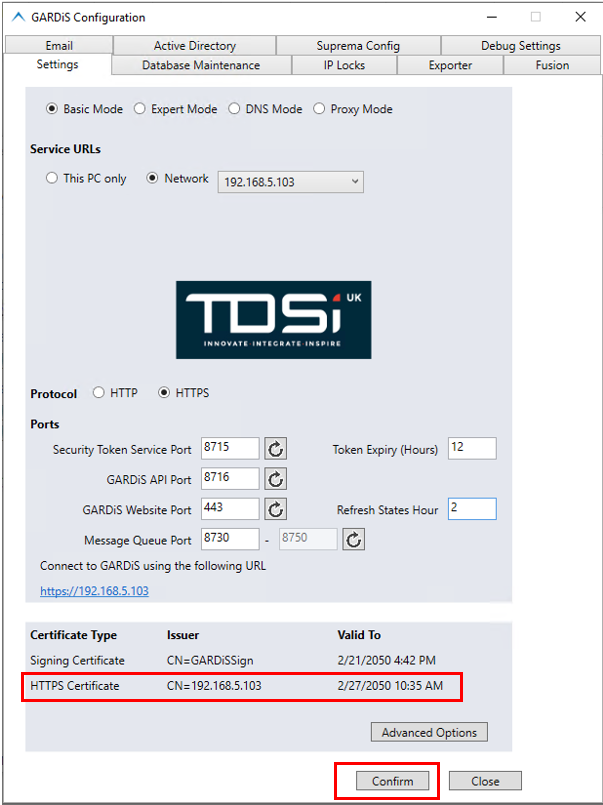
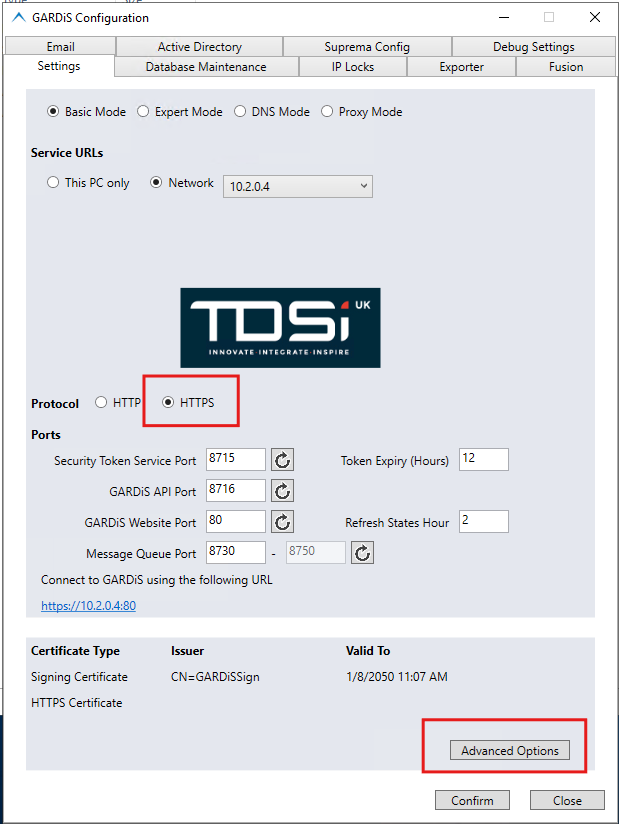
Select HTTPS. Set the GARDiS Website Port to 443 (if port is available).Click 'Advanced Options' on the settings tab.
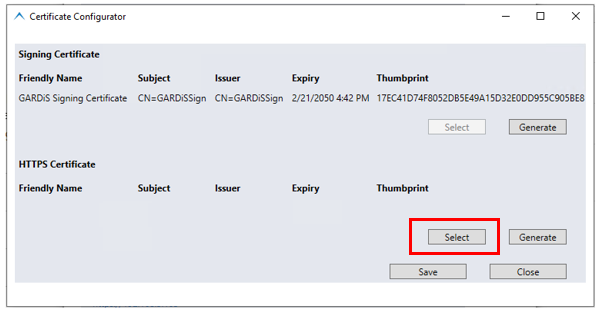
A new windows will open to allow you to Select or Generate a HTTPS certificate.
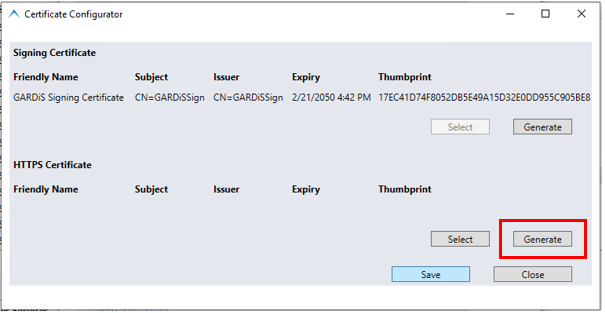
Click 'Generate' to allow GARDiS to generate a Self Signed Cerftificate.
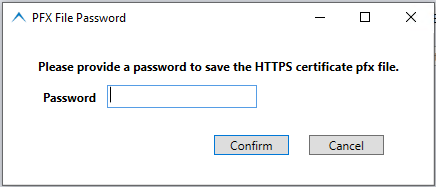
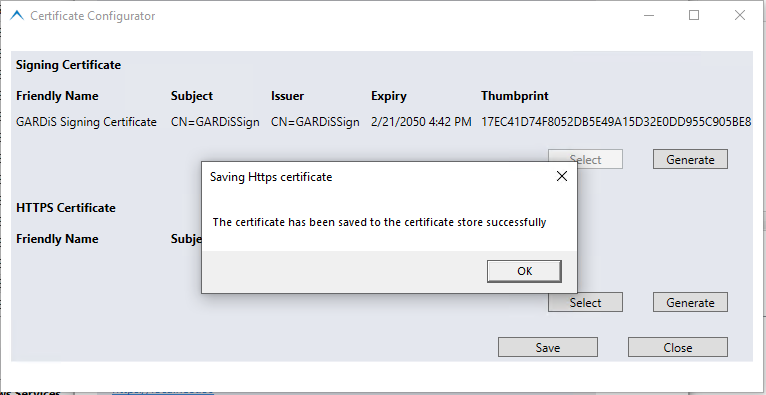
Enter a password for the certificate file. Click Confirm.
A confirmation will be displayed to indicate the https certificate has been saved to the certificate store.
Click Save on the Certificate Configurator window. The GARDiS Configuration tool will display the details of the new HTTPS certificate in the UI. Click Confirm. The system will apply the updates and restart the services.
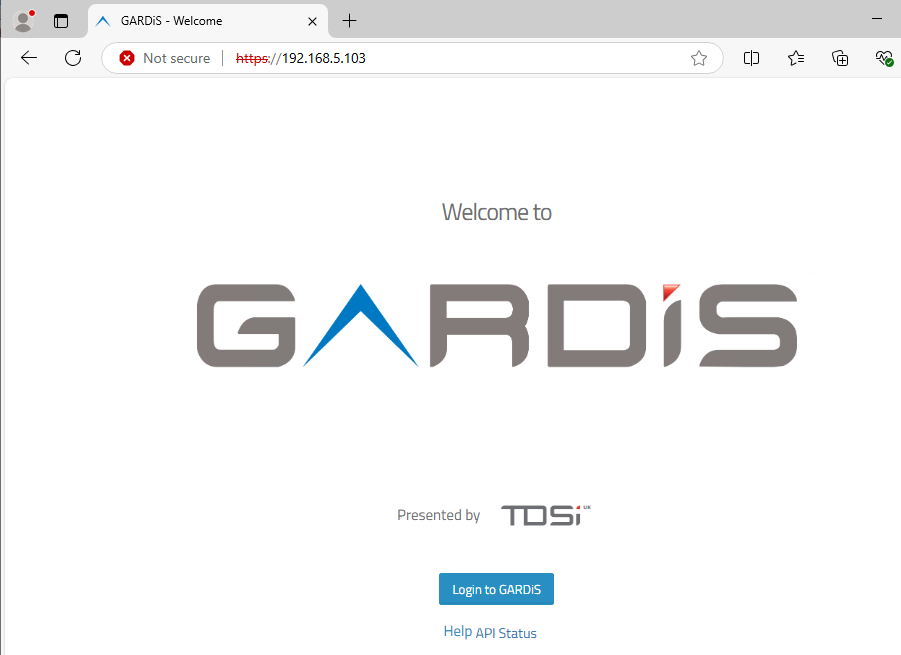
Navigate to the website prefixed with https://
There are two methods available to install a certificate.
Option 1 - using the certutil command. This will give an advantage over right clicking the pfx file and selecting install. This advantage is not needing to worry about selecting the correct options for installing, and also won’t need to manually copy the certificate to the trusted store.
Open command line and run as an administrator. Navigate to the location of the pfx file. Replace GardisHttps.pfx with the name of the pfx file.
CERTUTIL -f -v -p {Pa$$W0rd H@r@} -importpfx GardisHttps.pfx
This will add the certificate to the Certificate store, Local Machine\My (Personal) and also the Trusted Certificate folder.
Option 2 - Right Click Install pfx file
Once you right click and select install, the following dialog box will be displayed.
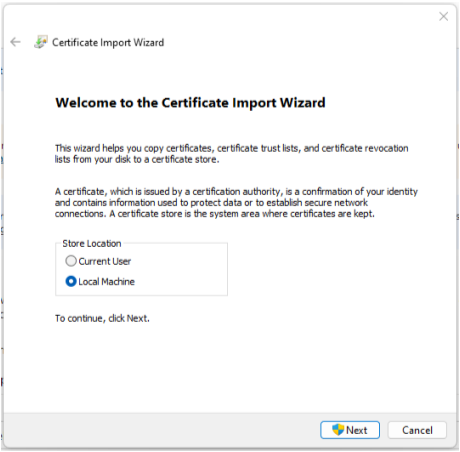
Select the local machine option and click next.
You will be then asked for an admin user and password. The next screen will show you pfx file you wish to install. Click next to continue.
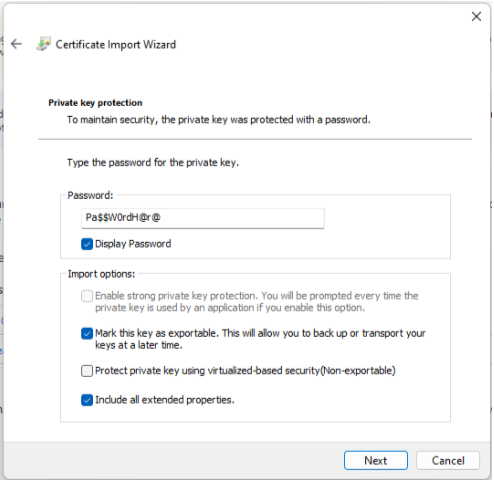
On the next screen, enter in the password and also select the option, Mark the key as exportable.
On the next screen you can leave on the automatic option and then click next. To complete the process, click Finish on the final screen.
Run mmc as Administrator. Select the Add snapin from the File menu, select the Certificates snapin, it will ask you for which manager, select local computer. Click next and then click Finish on the final screen to manage the local computer. Then click OK to close the snap-in dialog.
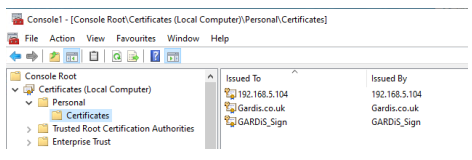
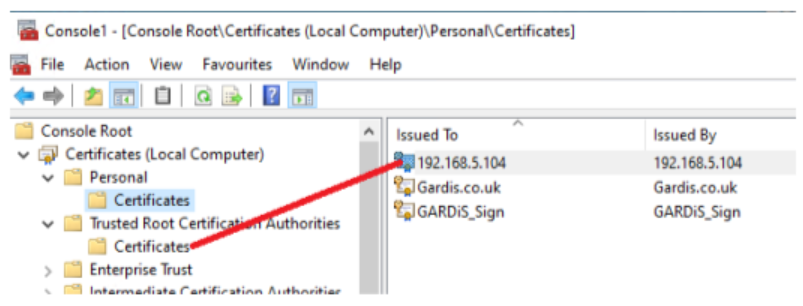
In the personal folder, you should find an entry, this should match the IP address of the server or localhost, depending on your configuration.
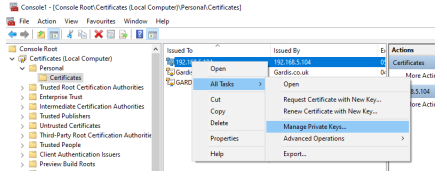
Right click on the certificate entry and select the Manage Private Keys from the All Tasks menu.
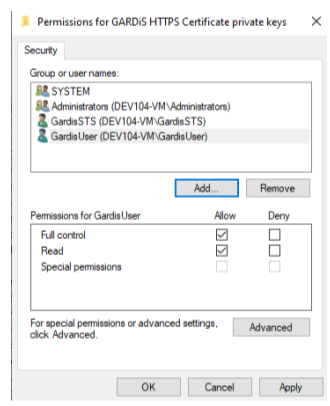
In the next dialog box, you will need to add The GardisSts & GardisUser with full control. This will allow the STS and API services to gain access to the private keys on the certificate to encrypt all data.
The final step is to copy this certificate entry into the Trusted Root Certification Authorities, so the certificate is trusted on the server.
Note: The Self-Signed generated certificates are copied to these locations automatically.
The final part is to add this to Gardis.
Open the GARDiS Configuration tool as Administrator.
Select HTTPS. Set the GARDiS Website Port to 443 (if port is available).Click 'Advanced Options' on the settings tab.
Click Select
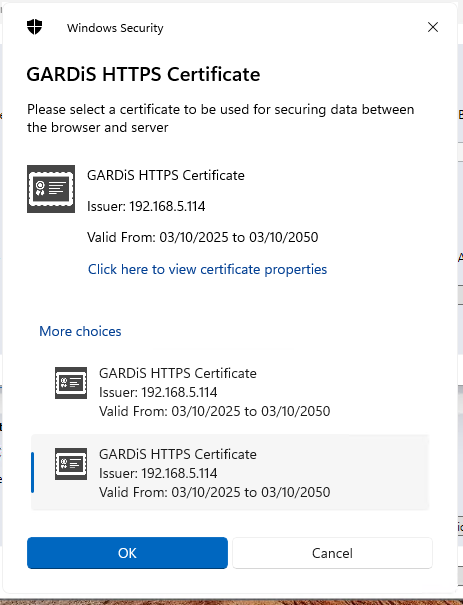
Click More Choices to view more certificate choices. Select the required certificate
Click Confirm in the GARDiS Configuration tool to apply the certificate.
1. Set system to dns / ip settings as required.
2. Click Advanced Options
3. Generate a self signed certificate to create the “Path” and the “KeyPath” variables in the json file.
4. Update the following files with the correct .pem file and the correct .key file. See example of the json updates below.
Example of json update in the files.
"Kestrel": {
"EndPoints": {
"Https": {
"Url": "https://151.80.112.32:8715",
"Certificate": {
"Path": "C:\\ProgramData\\GARDiS\\customerHTTPS.pem",
"KeyPath": "C:\\ProgramData\\GARDiS\\customerHTTPS.key"
}
}
}
}
5. Restart the services:-
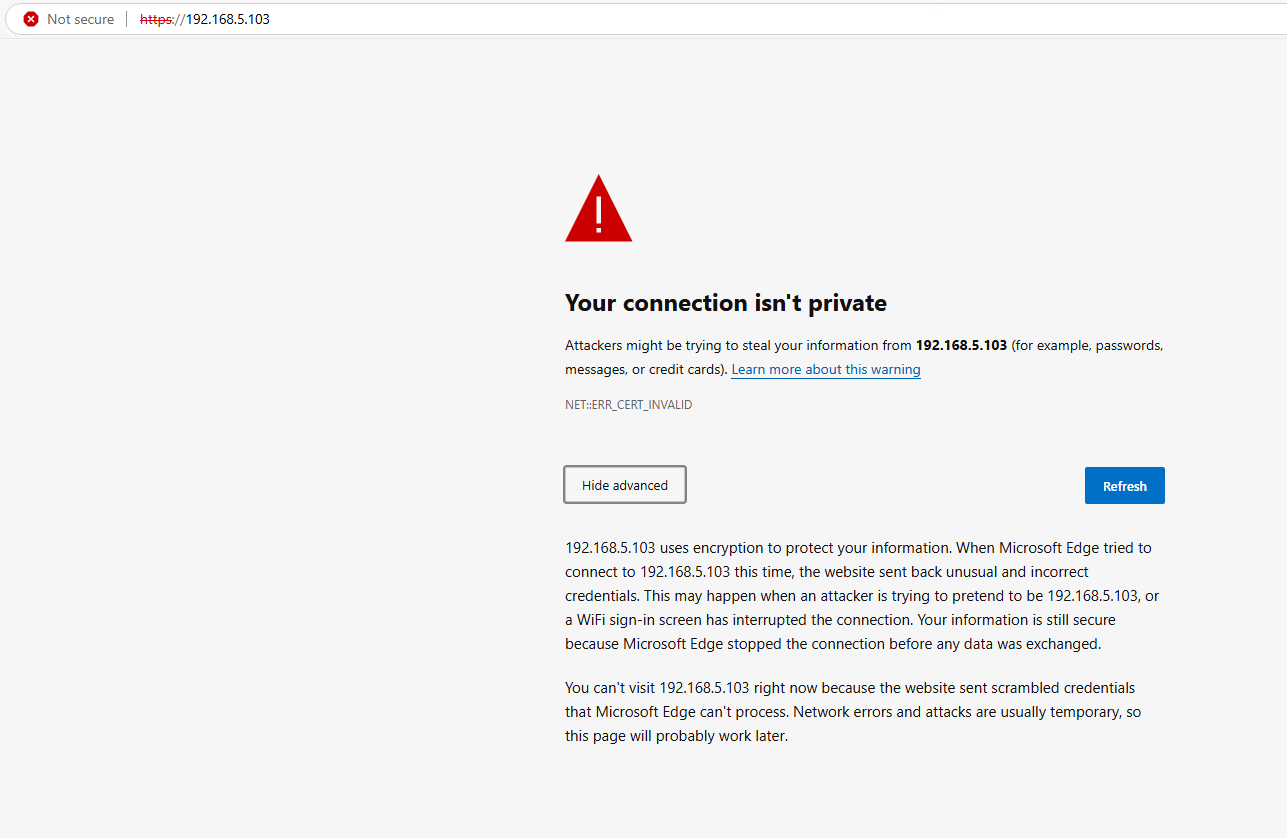
NET:::ERR_CERT_INVALID reported when trying to browse to GARDiS.
This could happen if the browser was left open when generating the self signed certificate. Close the browser and reopen.